Friday, April 18, 2025
Setting Up Engagement Tracking & Unsubscribe Links in Strama AI

Kevin Tamura

This guide walks you through setting up email engagement tracking and unsubscribe links in Strama AI, helping you improve deliverability and gain valuable insights into your email campaigns.
What You'll Learn
- How to configure a tracking subdomain for your organization
- How to set up DNS records with your domain provider
- How to implement tracking pixels in your email signature
- How to add an unsubscribe link to your emails
Prerequisites
- Admin access to your Strama AI account
- Access to your domain's DNS management (or contact with your IT team)
- Your current email signature
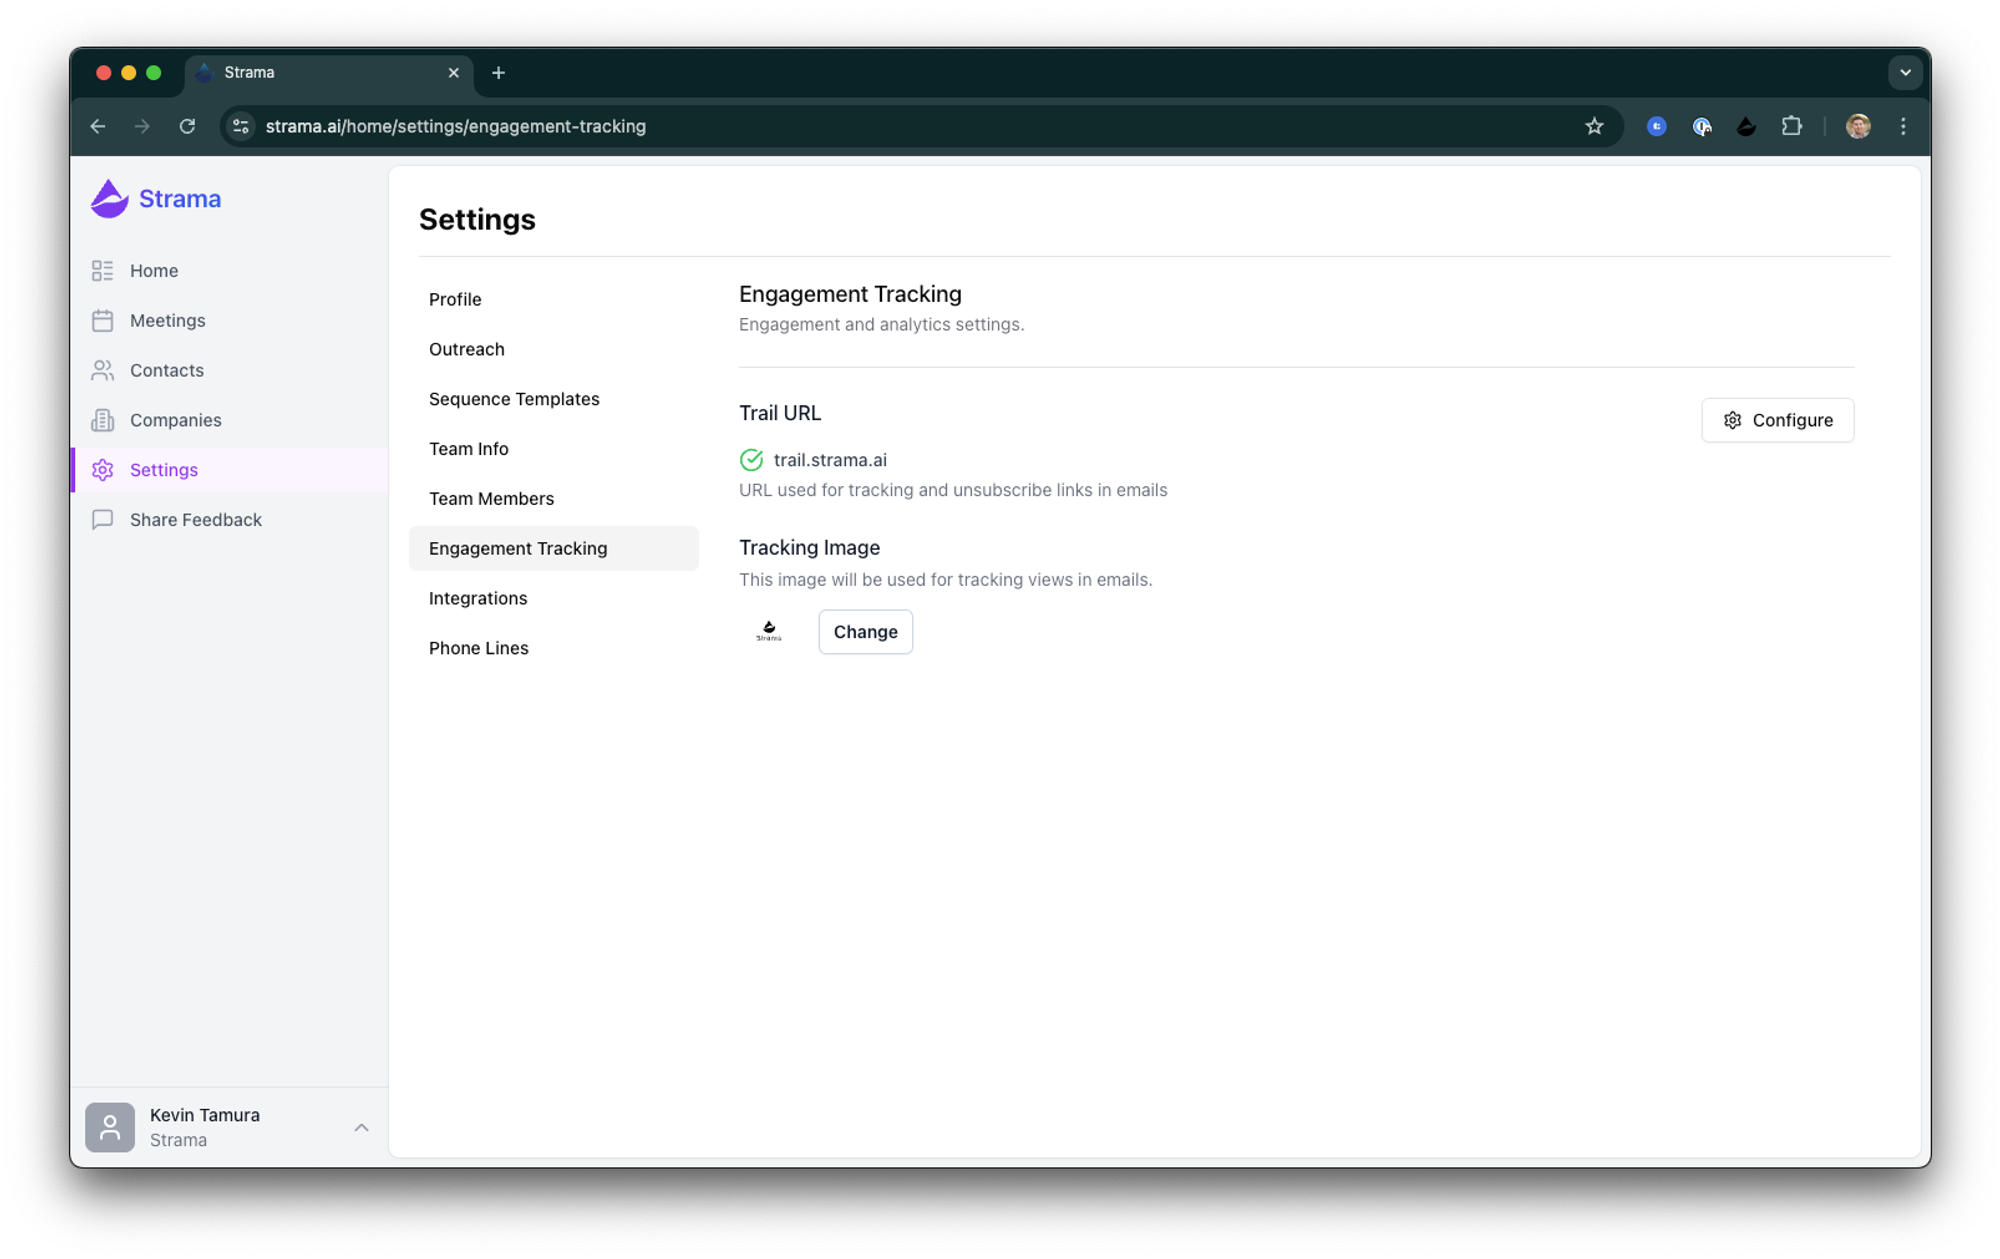
Step 1: Navigate to Engagement Tracking Settings
- Log in to your Strama AI account
- Click on Settings in the top navigation menu
- Select Engagement Tracking from the left sidebar
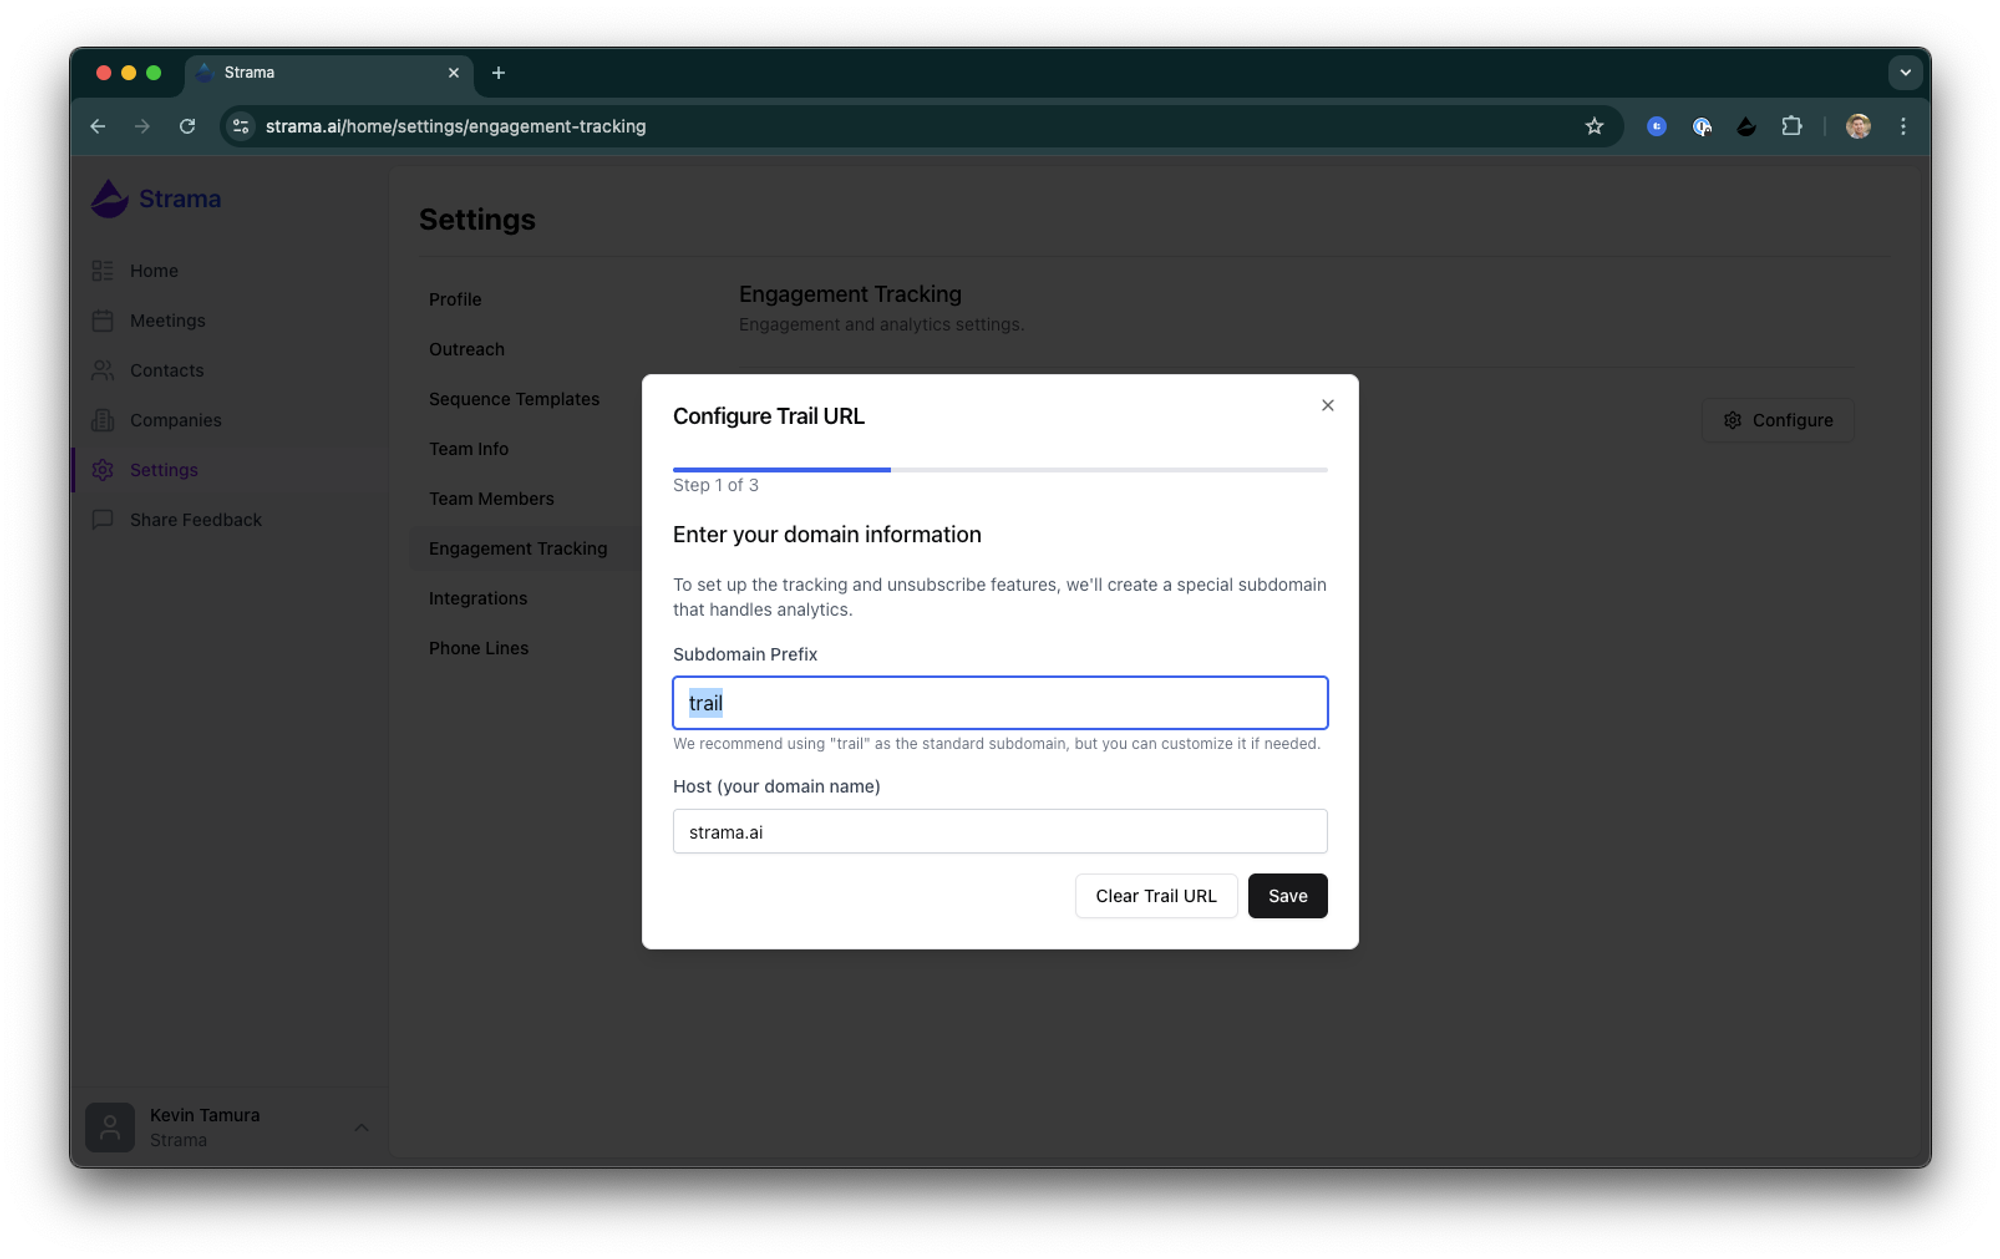
Step 2: Configure Your Tracking Subdomain
- In the Engagement Tracking section, click Configure next to "Tracking URL"
- Choose a subdomain prefix (we recommend using "trail" as the standard subdomain)
- Enter your organization's domain name (e.g., if your email is name@example.com, your domain is example.com)
- Click Save
Step 3: Set Up DNS Records
After saving your tracking subdomain, you'll need to create a CNAME record with your DNS provider:
- Log in to your DNS provider (e.g., Cloudflare, GoDaddy, Route 53)
- Navigate to the DNS management section for your domain
- Create a new record with the following settings:
- Type: CNAME
- Name: Enter the subdomain prefix you chose (e.g., "trail")
- Value/Target: Enter the target value provided by Strama (will be displayed on your screen)
- Save the changes
Note: DNS changes can take up to 24-48 hours to propagate across the internet. If validation doesn't work immediately, please check back later.
Example DNS Configuration for Common Providers
GoDaddy
- Log in to your GoDaddy account at godaddy.com
- Go to My Products (or visit https://account.godaddy.com/products/)
- Click on DNS next to the domain you want to configure
- In the Records list, click Add New Record
- Select CNAME from the Type menu
- In the Name field, enter only your subdomain prefix (e.g., "trail") without your domain name
- In the Value/Points to field, enter the target value provided by Strama
- Leave the TTL setting as default (1 hour)
- Click Save
Important Note for GoDaddy: When entering the Name field, only include the subdomain prefix without your domain name. GoDaddy automatically appends your domain to the record.
Cloudflare
- Log in to your Cloudflare account
- Select your domain from the dropdown menu in the top left
- Click on DNS in the left sidebar
- Click + Add record
- For Type, select CNAME
- In the Name field, enter your subdomain prefix (e.g., "trail")
- In the Target field, enter the target value provided by Strama
- For tracking purposes, toggle the Proxy status to DNS only (gray cloud icon)
- Leave the TTL setting as Auto
- Click Save
Step 4: Validate DNS Record
- After setting up your DNS record, return to the Strama Engagement Tracking page
- Click Validate DNS Record
- If successful, you'll see a confirmation message
If validation fails, please check:
- That you've entered the correct CNAME record
- That enough time has passed for DNS propagation (up to 24-48 hours)
- That you have the correct permissions to modify DNS settings
Step 5: Configure Tracking Image
- In the Engagement Tracking settings, find the "Tracking Image" section
- Click Change to upload the image you currently use in your email signature
- This image will be replaced with Strama's tracking pixel while maintaining the same appearance
Step 6: Update Your Email Signature
- Navigate to Outreach Settings in the left sidebar
- Find your email signature (Strama syncs with your email provider's signature)
- Locate the image in your signature by finding the HTML code with
<img src="..." - Replace the source URL by:
- Selecting the entire content within the quotes after
src= - Clicking Add Tracking Image at the bottom of the page
- Pasting the new tracking image URL
- Selecting the entire content within the quotes after
Step 7: Add Unsubscribe Link
- While still in the email signature editor, scroll to the bottom of your signature
- Click Add Unsubscribe Link
- This will add a compliant unsubscribe option to all your emails
Step 8: Preview and Save
- Click Preview to see how your signature will appear with the tracking image and unsubscribe link
- Check both desktop and mobile views
- If everything looks good, click Save
Troubleshooting
DNS Validation Issues
- Ensure you've created a CNAME record (not A, TXT, or other record types)
- Verify the subdomain prefix matches exactly what you entered in Strama
- Contact your IT team if you don't have direct access to DNS settings
Signature Image Problems
- Make sure you're updating the correct
srcattribute in the HTML - Verify that you've selected the complete URL within the quotes
- Ensure you've saved changes after making modifications
Next Steps
After setting up engagement tracking and unsubscribe links:
- Monitor Open Rates: Track email opens through the Strama dashboard
- Analyze Engagement: Review which prospects are engaging with your emails
- Optimize Campaigns: Use engagement data to refine your outreach strategy
For additional assistance, contact our support team at support@strama.ai or book a personalized walkthrough with our team.
Happy selling!